
Hello crafty friends!

I'm here today with another SparkleNSprinkle creation, once again featuring the Botanical Orchid Stamp Set. I call this one the "light" version, as my last card was made on the dark cardstock. Pretty witty, right?
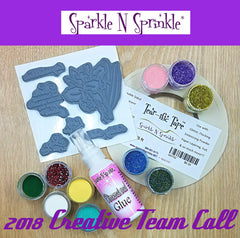
SparkleNSprinkle Supply List:
Alright! Let's dive into the creation of this card! The size of this card is approx 5x5 I think! It features both the digital version AND the rubber version of the stamp set. I printed off the colored digi version of the flower (x2!) and the sentiment. I did fussy cut out the image using a pair of Tonic 5" Mini Scissors (these are AWESOME for fussy cutting small areas and trimming ribbon!). I actually trimmed out both flowers and used the second one to "pop-up" the bottom layer of flower!

To accentuate the flower, I used the Quicky Glue Pen to add GLITTER! I added Citron Green Glitter around the leaves of the flowers. I also added Lemonade Glitter to the yellow areas and Sparkling Snow to the centers. So pretty!

After I matted the sentiment to some brown cardstock, I decided I wanted to accent the word "bloom". I traced the word with the Quicky Glue Pen and sprinkled on Antiquities Embossing Powder and heat set. It made the word just pop a little bit more.

I set those pieces aside and set to work on my background. I had this really pretty sheet of patterned paper in my stash that I felt went perfect with this card. I matted it onto some green cardstock using the 1/4" Tear-ific Tape. I took another piece of green cardstock and ran it through my Big Shot using the Filigree Affections Embossing Folder (such a gorgeous, detailed folder!). On top of that piece, I added a piece of the NEW Patchwork Parchment Craft Perfect Papers. You just HAVE to pick up some of these gorgeous papers.
I still felt the card need a little extra "sparkle" - so I grabbed some more Embossing Powder & the rubber stamp set! I used the RUBBER Flower Stamp and stamped randomly all over the edges (top and bottom) of the background with Versamark ink. Next, I sprinkled on the Candlelight Embossing Powder all over the stamped images and heat set, creating a very subtle accent to the patterned paper.

I adhered my focal image and sentiment to the background using some foam tape and 1/4" Tear-Ific Tape.


Finally, as the finishing touch, I added the Dark Walnut Crystal Drops to the corners and to the sentiment. I love this rich color! I also added a little piece of twine around the base of the flowers - just a little extra touch.
Don't forget we are having a 2018 Creative Team Call, going on now through Dec 14. You can read all the details here.
I hope you enjoy this card! I would love to hear your comments below!
See you next time,
Jess
No comments:
Post a Comment